
How to Mark Your Quilt for Quilting
Choosing a Marking To0l
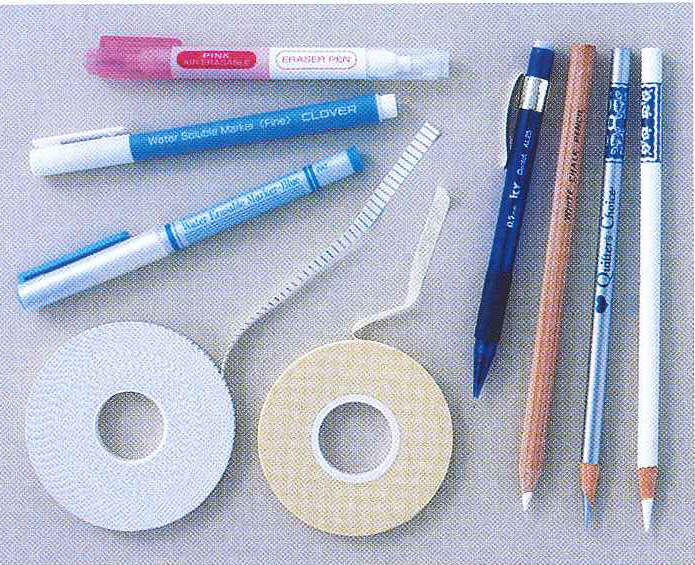
To mark a quilt top for hand quilting or quilting on a home sewing machine, use a marking tool that is visible but easily removed. As you can see from the photo above, there are a number of marking tools to choose from.
Mechanical and quilter’s pencils: A sharp pencil is the most common marking tool. A high-quality mechanical pencil with a 0.5 mm lead works well and always maintains a sharp point. A silver quilter’s pencil creates a line that is visible on dark fabrics, and the markings wash out easily. Regardless of what kind of pencil you use, remember to mark lightly.
Chalk pencils: Chalk pencils are available in several col ors and show up clearly on dark fabrics.These pencils can be sharpened to a fine point without crumbling, and they flow smoothly across fabric. When using a chalk pencil, mark the quilt top after layering it with the batting and backing. Mark as you go because the chalk rubs away easily.
Marking pens: Pens with disappearing ink can be found in both air-soluble and water-soluble types. All of these pens come with specific instructions and precautions for making the lines disappear. When using a disappearing ink pen, be sure to follow the manufacturer’s instructions exactly.
Masking tape: Masking tape is useful for marking straight lines and grids. It comes in several widths and can be used to mark small areas at a time. Be sure to remove the tape at the end of each quilting session, since it can leave a residue if left in place for a long period. If you want to mark a quilt top with masking tape, do so after layering the quilt top with the batting and backing.
Tracing the Design
Once you’ve selected the right marking tool, the next step is to trace the design onto your project. Trace the quilting design onto the quilt top before basting your quilt.
When marking light-colored fabric that you can see through, place the pattern sheet under the area to be marked. Using masking tape, secure the design to a hard surface. Place the area of the quilt to be marked over the design and anchor it in place with vveights or tape. Trace the design directly onto the fabric, remembering to mark lightly.
When working with medium-value fabrics, use tape or clamps to secure the pattern sheet to a light box. Place the quilt top over the pattern sheet and then trace the design onto the fabric, repositioning the quilt top as needed.
For dark fabrics, you can mark directly on the quilt top by tracing around a hard-edged template. To make a template, trace the design motif onto template plastic, and then cut it out along the outer edge of the motif. Place the template on the fabric and trace around it. Add the inner and connecting lines of the design by drawing them freehand on the quilt top. The template method is time-consuming, and I rarely use it.
These are a few of the ways available to quilters for marking their quilts before quilting. What is your favorite method and why? Comment below or send me an email. I would enjoy hearing from you.