
How to De-Clutter Your Work Space
I have always considered myself a pretty organized person. In my previous life, everything you did had to be documented to perfection. “A place for everything and everything in its place”. Then I started quilting. At first I followed my work motto to include quilting. When sewing was on the dining room table, everything had to be neatly put away after each sewing session. But as my space for quilting grew and moved to a spare bedroom, so did my unorganized spirit. Now, all I had to do was close the door to the quilting room and no one would see the mess. I would pick up things and store them neatly from time to time until my next project. This was not a very good system. Instead of using precious free time to sew, I wasted a lot of time looking for things and picking up my mess from the last project. After buying the same piece of yellow fabric three times because I could not find where I had placed it and out of desperation, I decided to put my work practices back into my quilting.
Here a few tips that helped me make a place for everything (i.e. de-clutter my work space):

1. Downsize your stash the same way you clean out your closet. Donate the fabric that you will never use to a charity that makes donation quilts like Quilts of Valor or Hearts and Hands. Contact your local quilt guild and ask how to make a donation to them. Ask friends if they would like to sort through what you are going to donate and let them take what they want.
2. Organize your fabric. I organize mine by color with the exception of my batiks. Some of my friends organize their fabric by type. An example would be all the flannels together, all the batiks together, all their Tula Pink fabric together etc. If you don’t have a lot of shelving space use stackable, clear storage boxes or baskets.
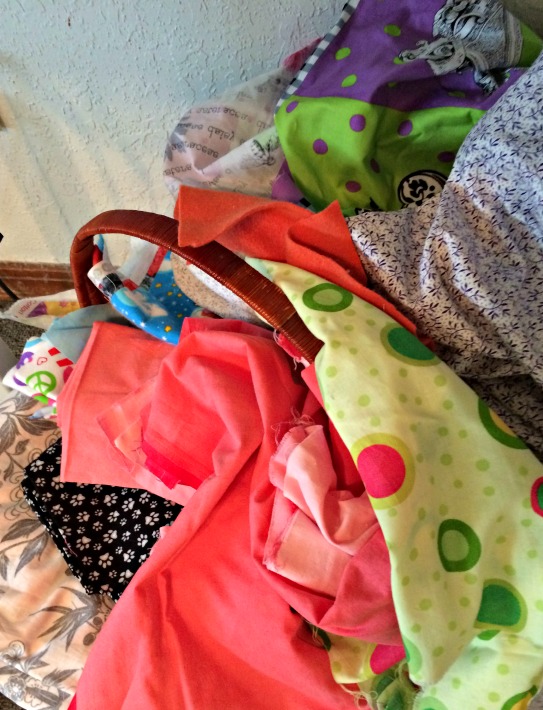
3. When I am finished with a project, I cut leftover pieces into my own stash of precuts – 2 1/2″ squares or strips, 5″ squares, 3″ strips – well your get the idea. I put these into large zip lock bags with the size written on the outside. I line the bags up in empty shoe boxes where they are easily visible. Next time I am making a quilt, I look through these precuts first. I know it will be hard but discard all the tiny little pieces that are unusable. There are some wonderful YouTube channels devoted strictly to using up your stash if you are looking for ideas.
4.Organize supplies into clear plastic jars that are available at places like Walmart, Dollar Tree, and Target for about a dollar depending on the size. Put all your scissors, seam rippers, and snips in one – all marking pens and pencils in another -rotary cutters in another.
5. Once your sewing/crafting area is organized it can be a big challenge to keep it that way. Make a habit of putting things back immediately after you use them. It may take a few uses to develop these practices, but in the long run you will have more time to sew!
What are your favorite tips on organizing your fabric and supplies. Send me an email or comment below. I am always interested in your ideas and tips.

#quilting #tipsandtricks #organization